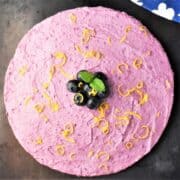
No-Bake Blueberry Cheesecake (Not Too Sweet)
This no-bake blueberry cheesecake features a low sugar, creamy, fruity filling that’s light and citrussy, spread over a delicious crust with a hint of cocoa. This recipe comes together very quickly and can be enjoyed the same day. Perfect for any occasion!
Servings 10 servings
Calories 325kcal
Equipment
- 8inch/20cm springform pan
Ingredients
The crust
- 6 ounces graham crackers/digestive biscuits or 1½ cups graham cracker crumbs
- 5 tablespoons butter melted
- 1½ tablespoons unsweetened cocoa powder
- 2 tablespoons light brown sugar
The filling mixture
- 1⅔ cups blueberries fresh or frozen, 9.17oz
- 5 tablespoons blueberry conserve or jam
- 1⅔ tablespoons cornstarch/cornflour
- 2 tablespoons lemon juice plus zest of 2 lemons
- 2 cups cream cheese full-fat, at room temperature
- ⅔ cup heavy whipping cream at least 40% fat, chilled
- 1 teaspoon vanilla extract
- ⅓ cup+1tbsp confectioners sugar/icing sugar
Instructions
- Prepare blueberry sauce: To a saucepan add the blueberries, jam and lemon zest (not the juice). Cook together until the blueberries release juice stirring often. Continue cooking, uncovered, over a low-medium heat for about 10-12 minutes until the mixture reduces a little and starts to thicken, stirring often (there should still be lots of syrupy juice left).
- Thicken sauce: In a small bowl stir together the cornstarch and lemon juice until smooth. Pour into the blueberry sauce and quickly stir in. Simmer for another minute or so (to ensure you don’t taste the cornstarch in the cheesecake filling mixture) stirring all the time. The blueberry mixture will become quite thick.
- Puree sauce: Transfer to a bowl, puree and set aside to cool completely. The mixture will thicken further as it cools.
- Prepare crust mixture: To a food processor add the crackers/biscuits and pulse to a fine crumb. Add the cocoa, melted butter and brown sugar and pulse a few times until thoroughly incorporated. Alternatively place the biscuits in a zip-top food bag and crush using a rolling pin then transfer to a bowl and stir in the rest of the ingredients (do this thoroughly).
- Make crust: Pour the crust mixture into your springform pan. Press into the bottom of the pan (not too tightly, just until the crust feels firm) and smooth out the surface using the bottom of a glass. Place the pan in the fridge for 30 minutes (or 15 in the freezer).
- Whip cream: Whip the cream on low speed into soft peaks being careful not to overbeat it (if the mixture is too thick it will be more difficult to incorporate into the cheesecake filling). Set aside.
- Beat cream cheese: Beat together the cream cheese, vanilla extract and confectioners’ sugar for a couple of minutes, until creamy and smooth.
- Add blueberry mixture: Beat in the blueberry mixture (make sure it’s completely cooled) until thoroughly incorporated. Scrape down the sides of the bowl as needed.
- Add cream: Gently fold in the cream (in 3 goes).
- Assemble cheesecake: Remove the pan from the fridge. Line the inside of the rim with a strip of parchment paper (this step is optional). Gradually spoon the cheesecake filling mixture into the pan spreading over the crust as evenly as you can. Refrigerate the cheesecake for 3-4 hours before serving.
- Serve: Using a knife or thin, flexible spatula loosen the cheesecake from the rim of the springform pan and carefully remove the rim (if you used parchment simply unlock and remove the rim then peel off the paper). Enjoy!
Notes
- The crust: You can make it either using a food processor or by hand (see Instructions for details).
- The blueberry sauce: After adding the cornstach cook the mixture for another minute stirring all the time. Cool completely before combining with the other filling ingredients.
- Cutting: Cut the cheesecake using a sharp knife wiping it clean before cutting the next slice.
- Serving: Refrigerate for 3-4 hours before serving.
- Storing: Keep covered, refrigerated, for up to 4 days.
- Freezing: Place the cheesecake (without the rim) in the freezer for 2 hours. Take out of the freezer, remove the bottom of the springform pan then wrap the cake tightly in plastic wrap and place in a freezer bag (or large airtight container). Freeze for up to 3 months. Defrost in the fridge overnight.
Nutrition
Serving: 1serving | Calories: 325kcal | Carbohydrates: 31g | Protein: 6g | Fat: 21g | Saturated Fat: 12g | Polyunsaturated Fat: 1g | Monounsaturated Fat: 5g | Trans Fat: 0.2g | Cholesterol: 59mg | Sodium: 338mg | Potassium: 211mg | Fiber: 2g | Sugar: 16g | Vitamin A: 687IU | Vitamin C: 5mg | Calcium: 104mg | Iron: 1mg